
Last updated November 2026
Original van blog post: My Ram Promaster Van
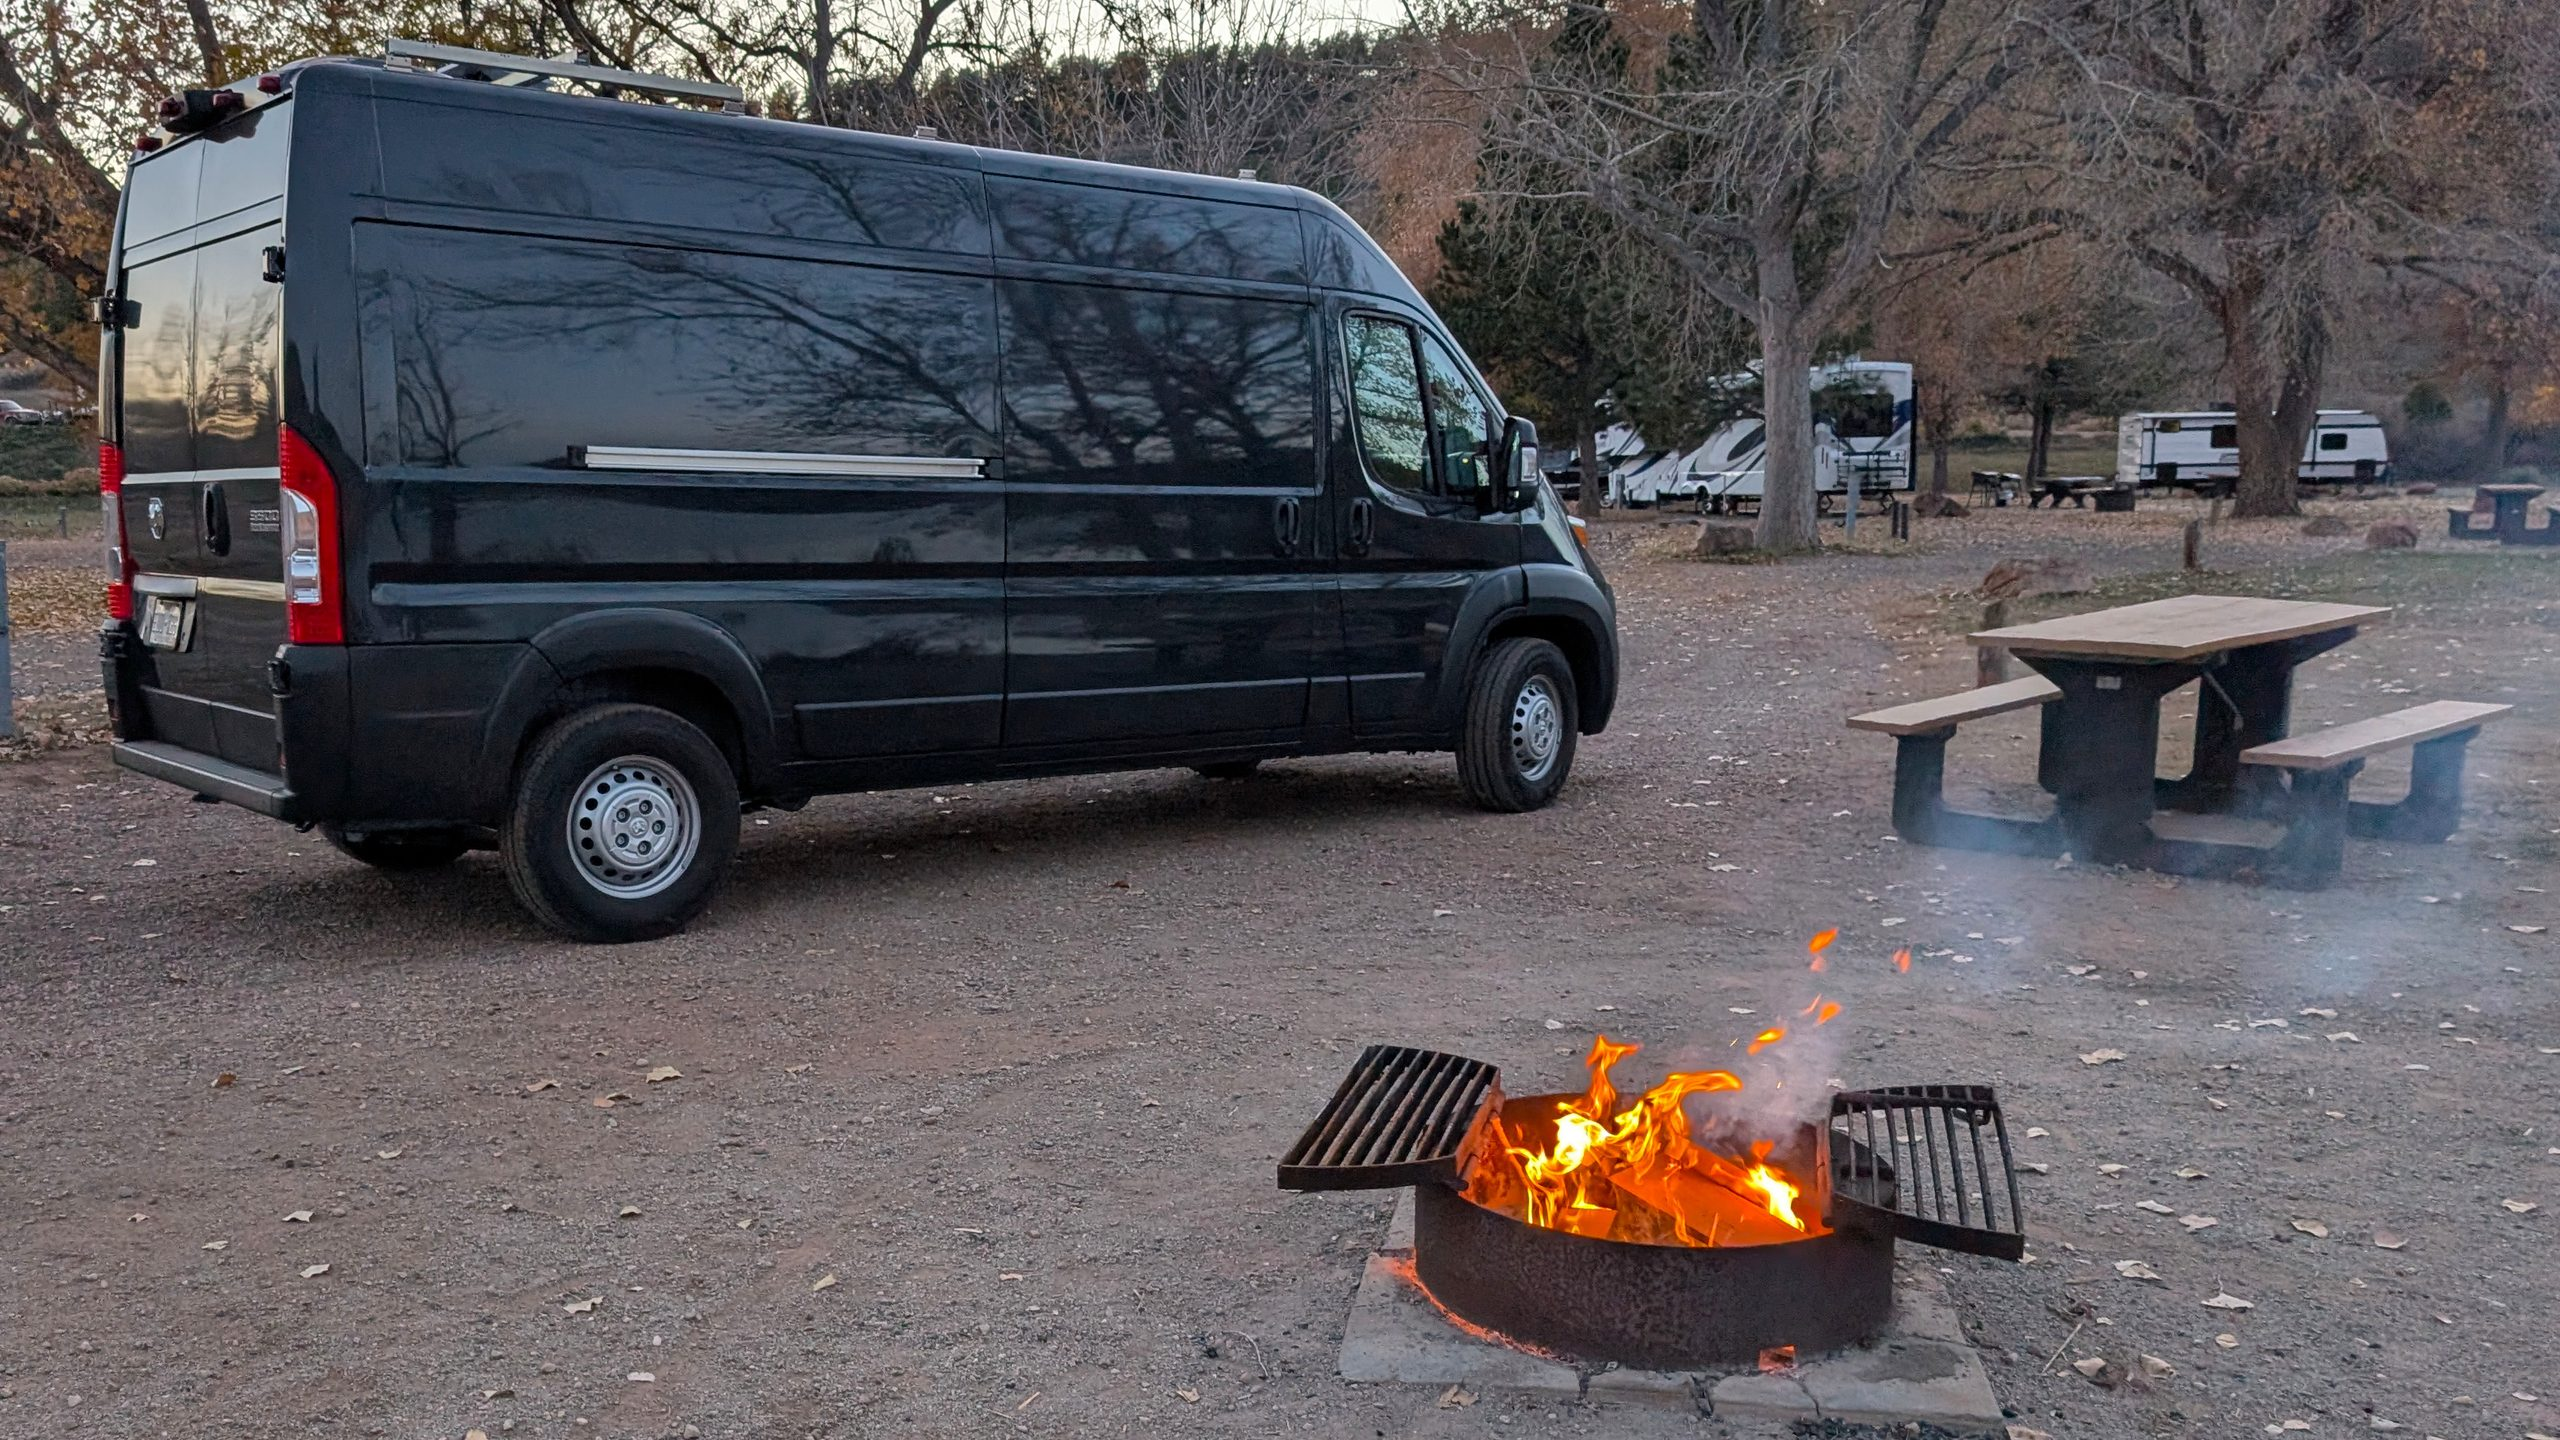
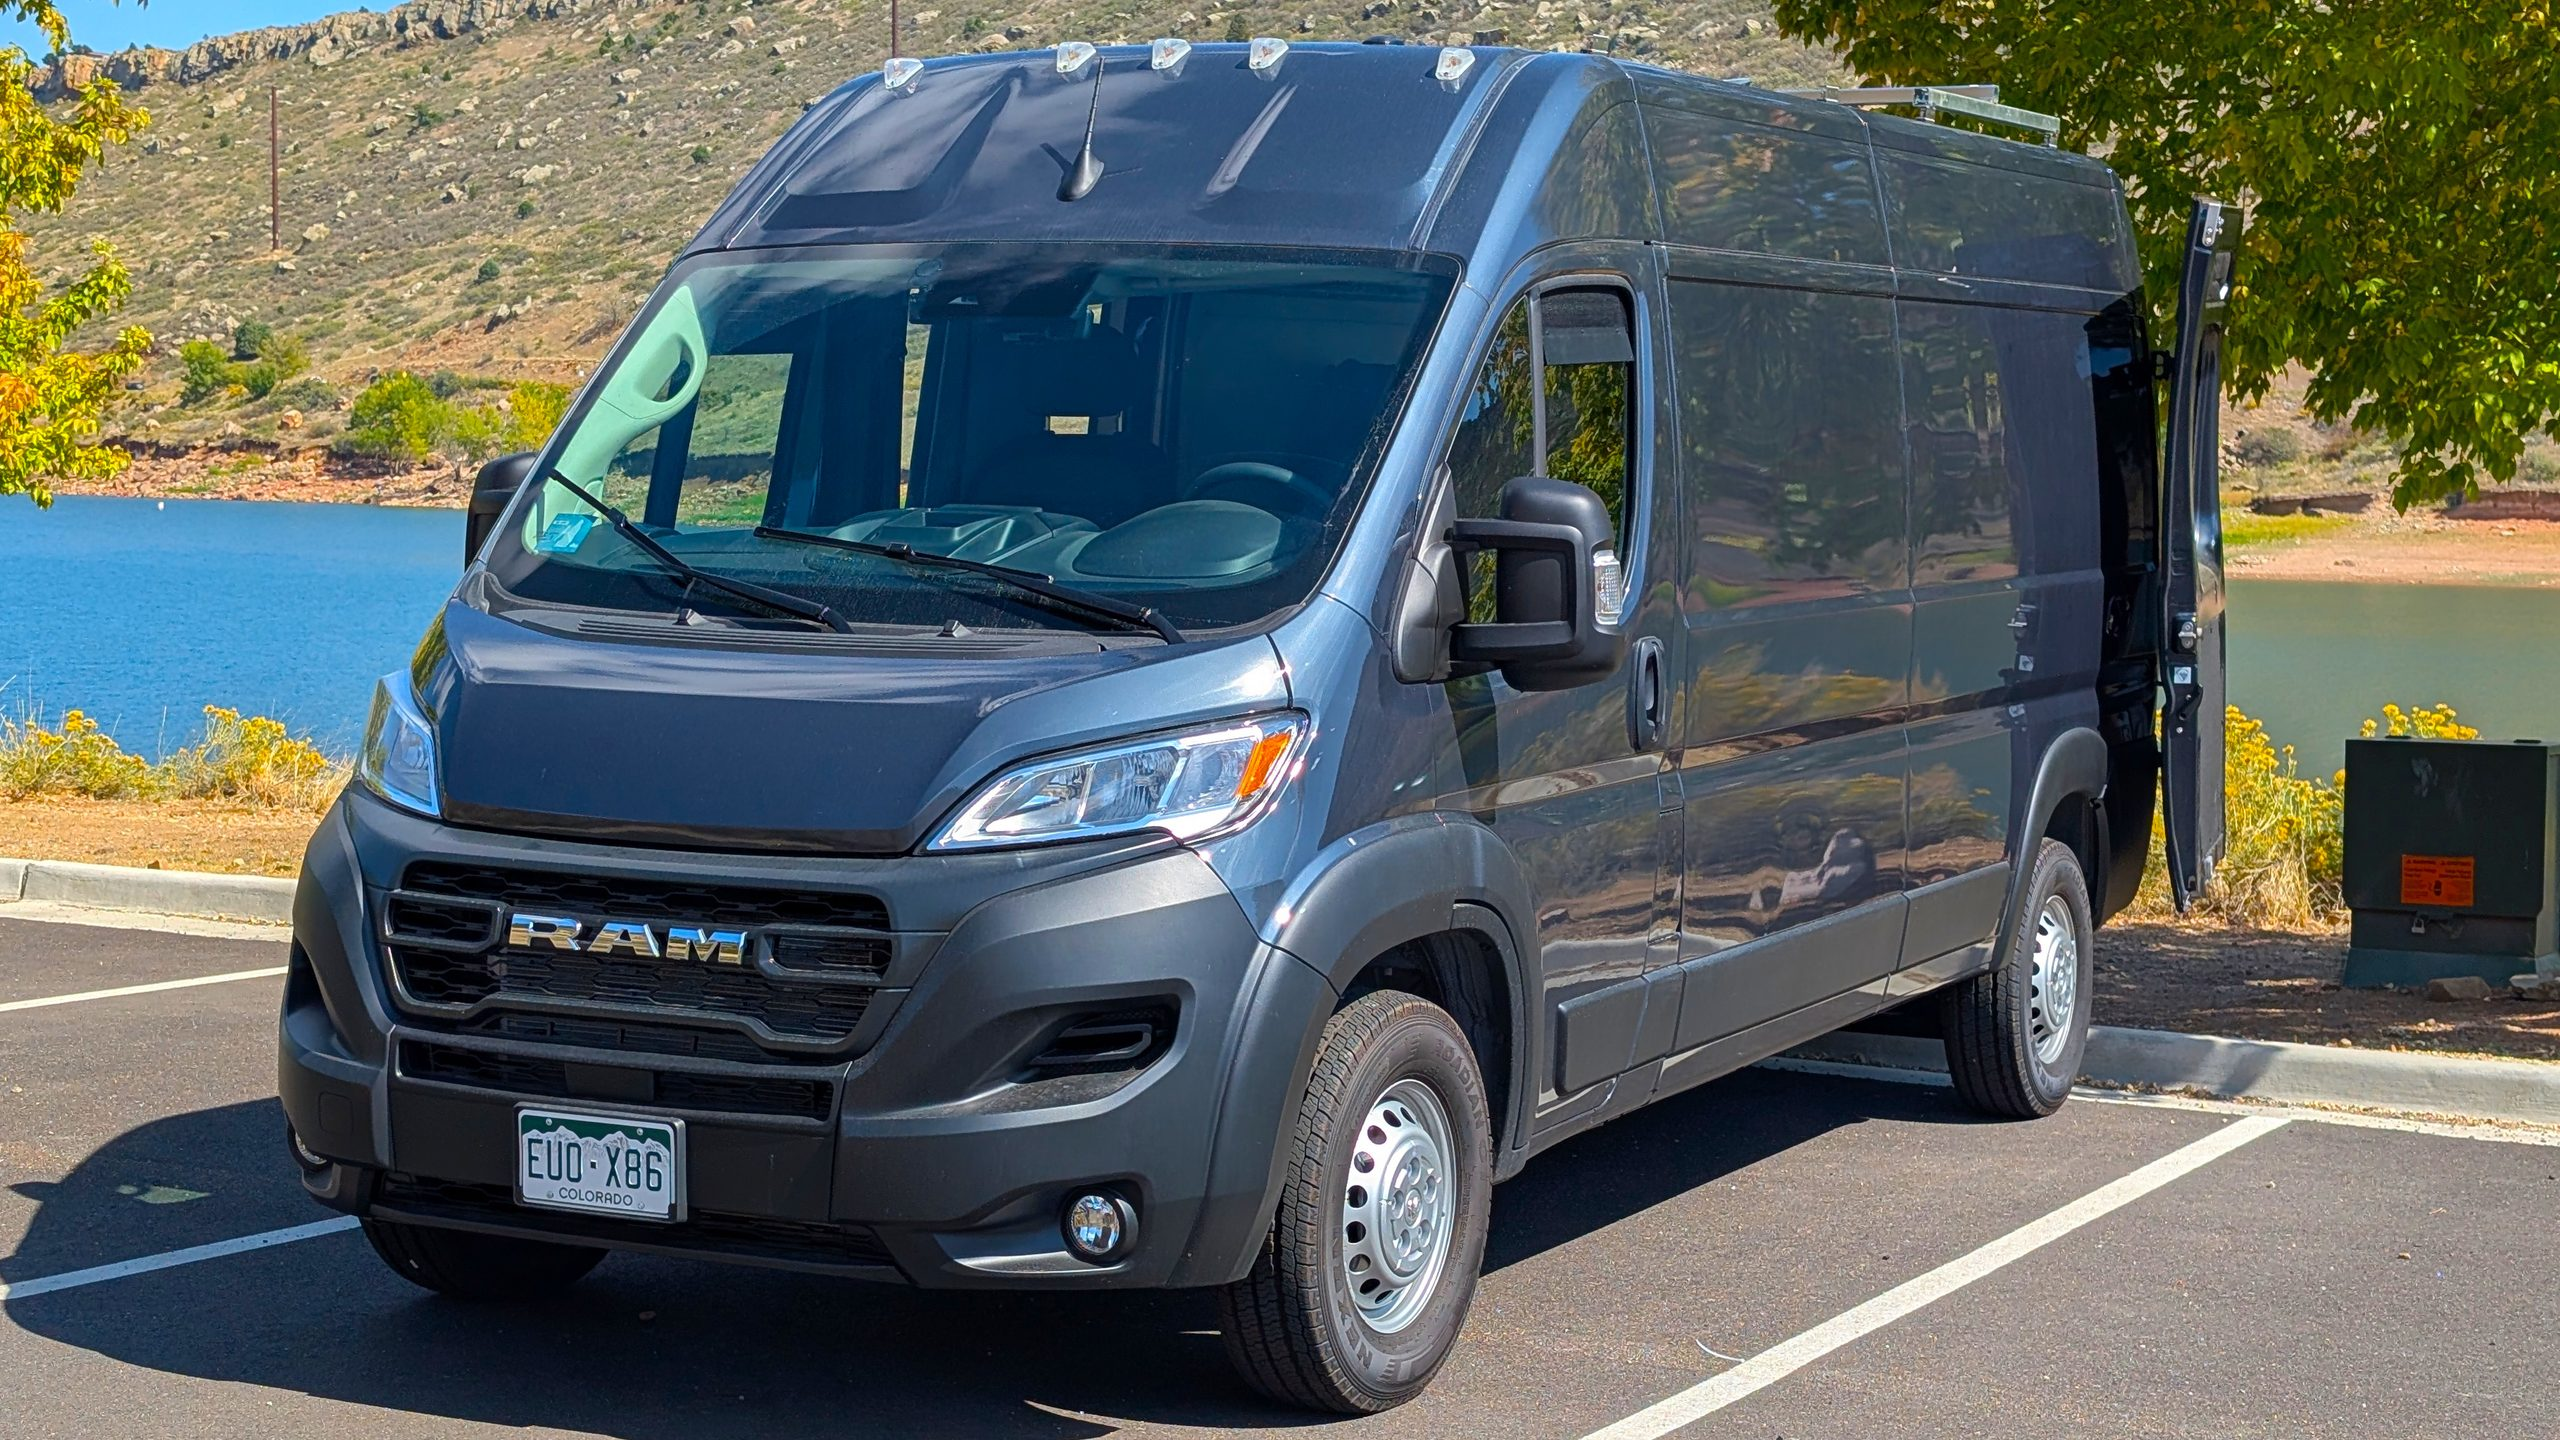
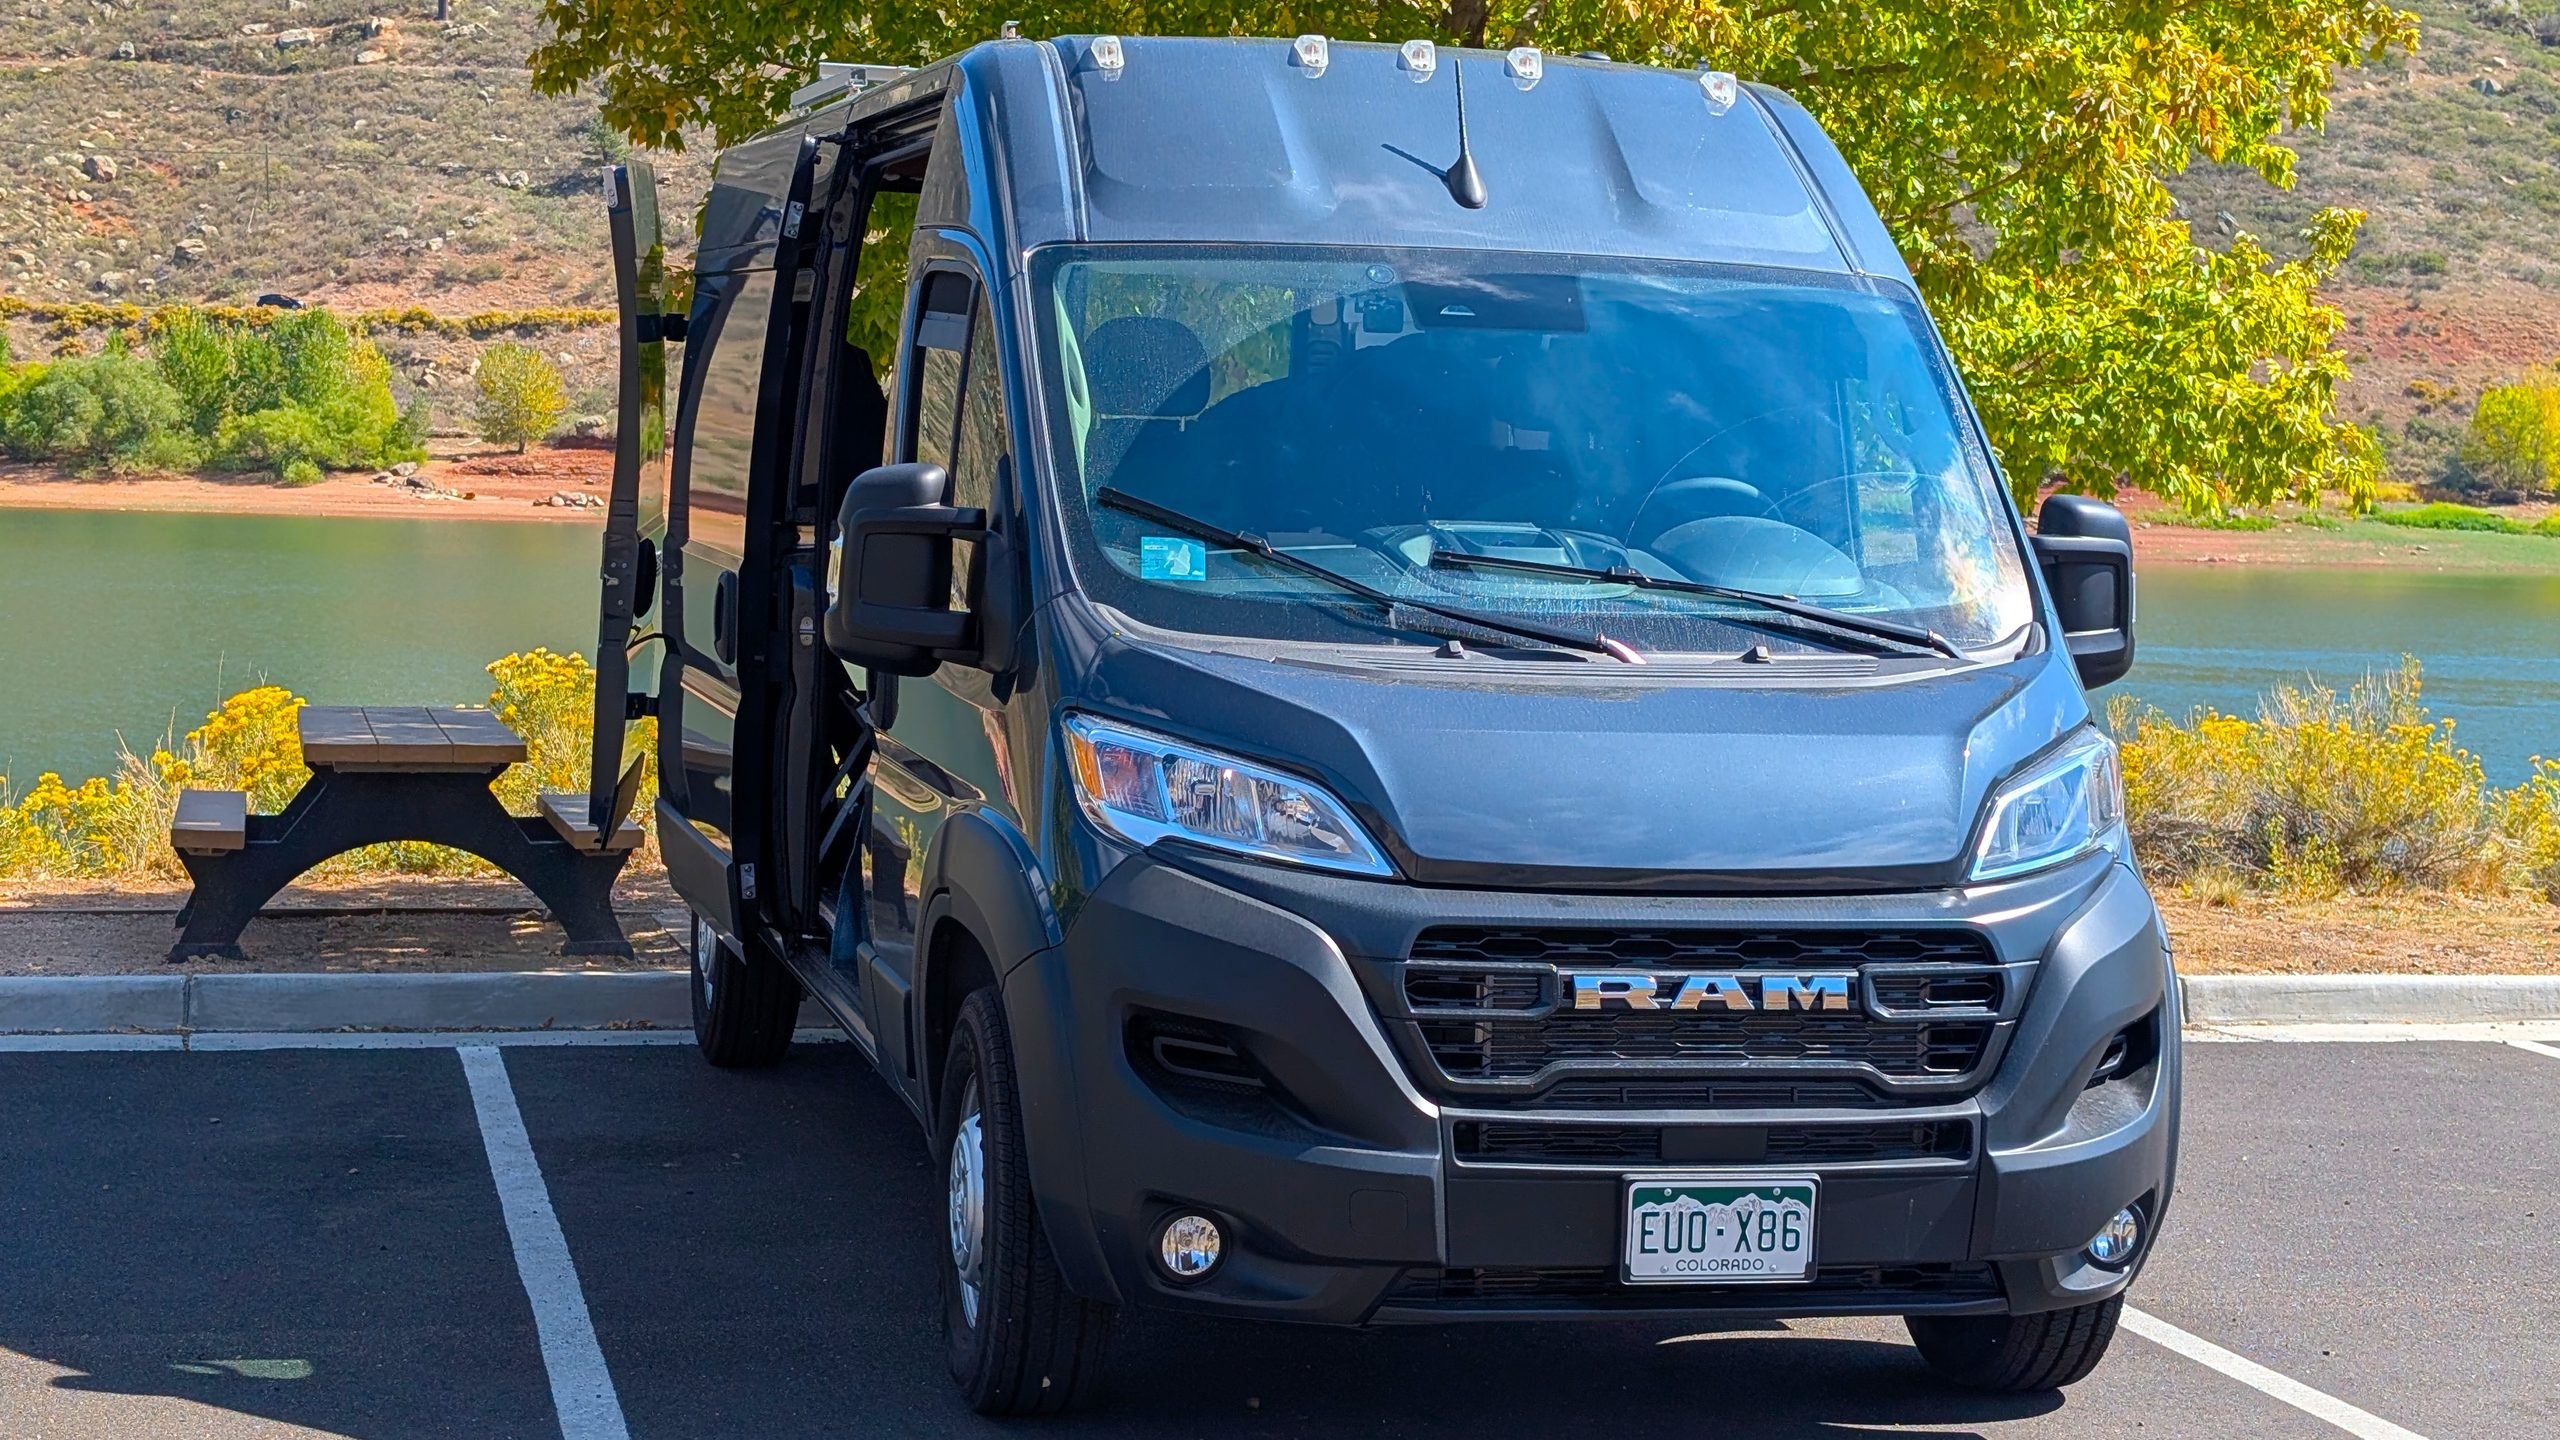
I’ve had a few people ask what I’m planning to do with the van they see me working on occasionally. The short answer is that you can think of it as a camper van, but I’d like to keep it versatile for other purposes. If you’re really curious, I’m using this blog post to update build status. This is mainly to help keep me on track, but hopefully there is something useful or interesting for others here.
The Long-Term Idea
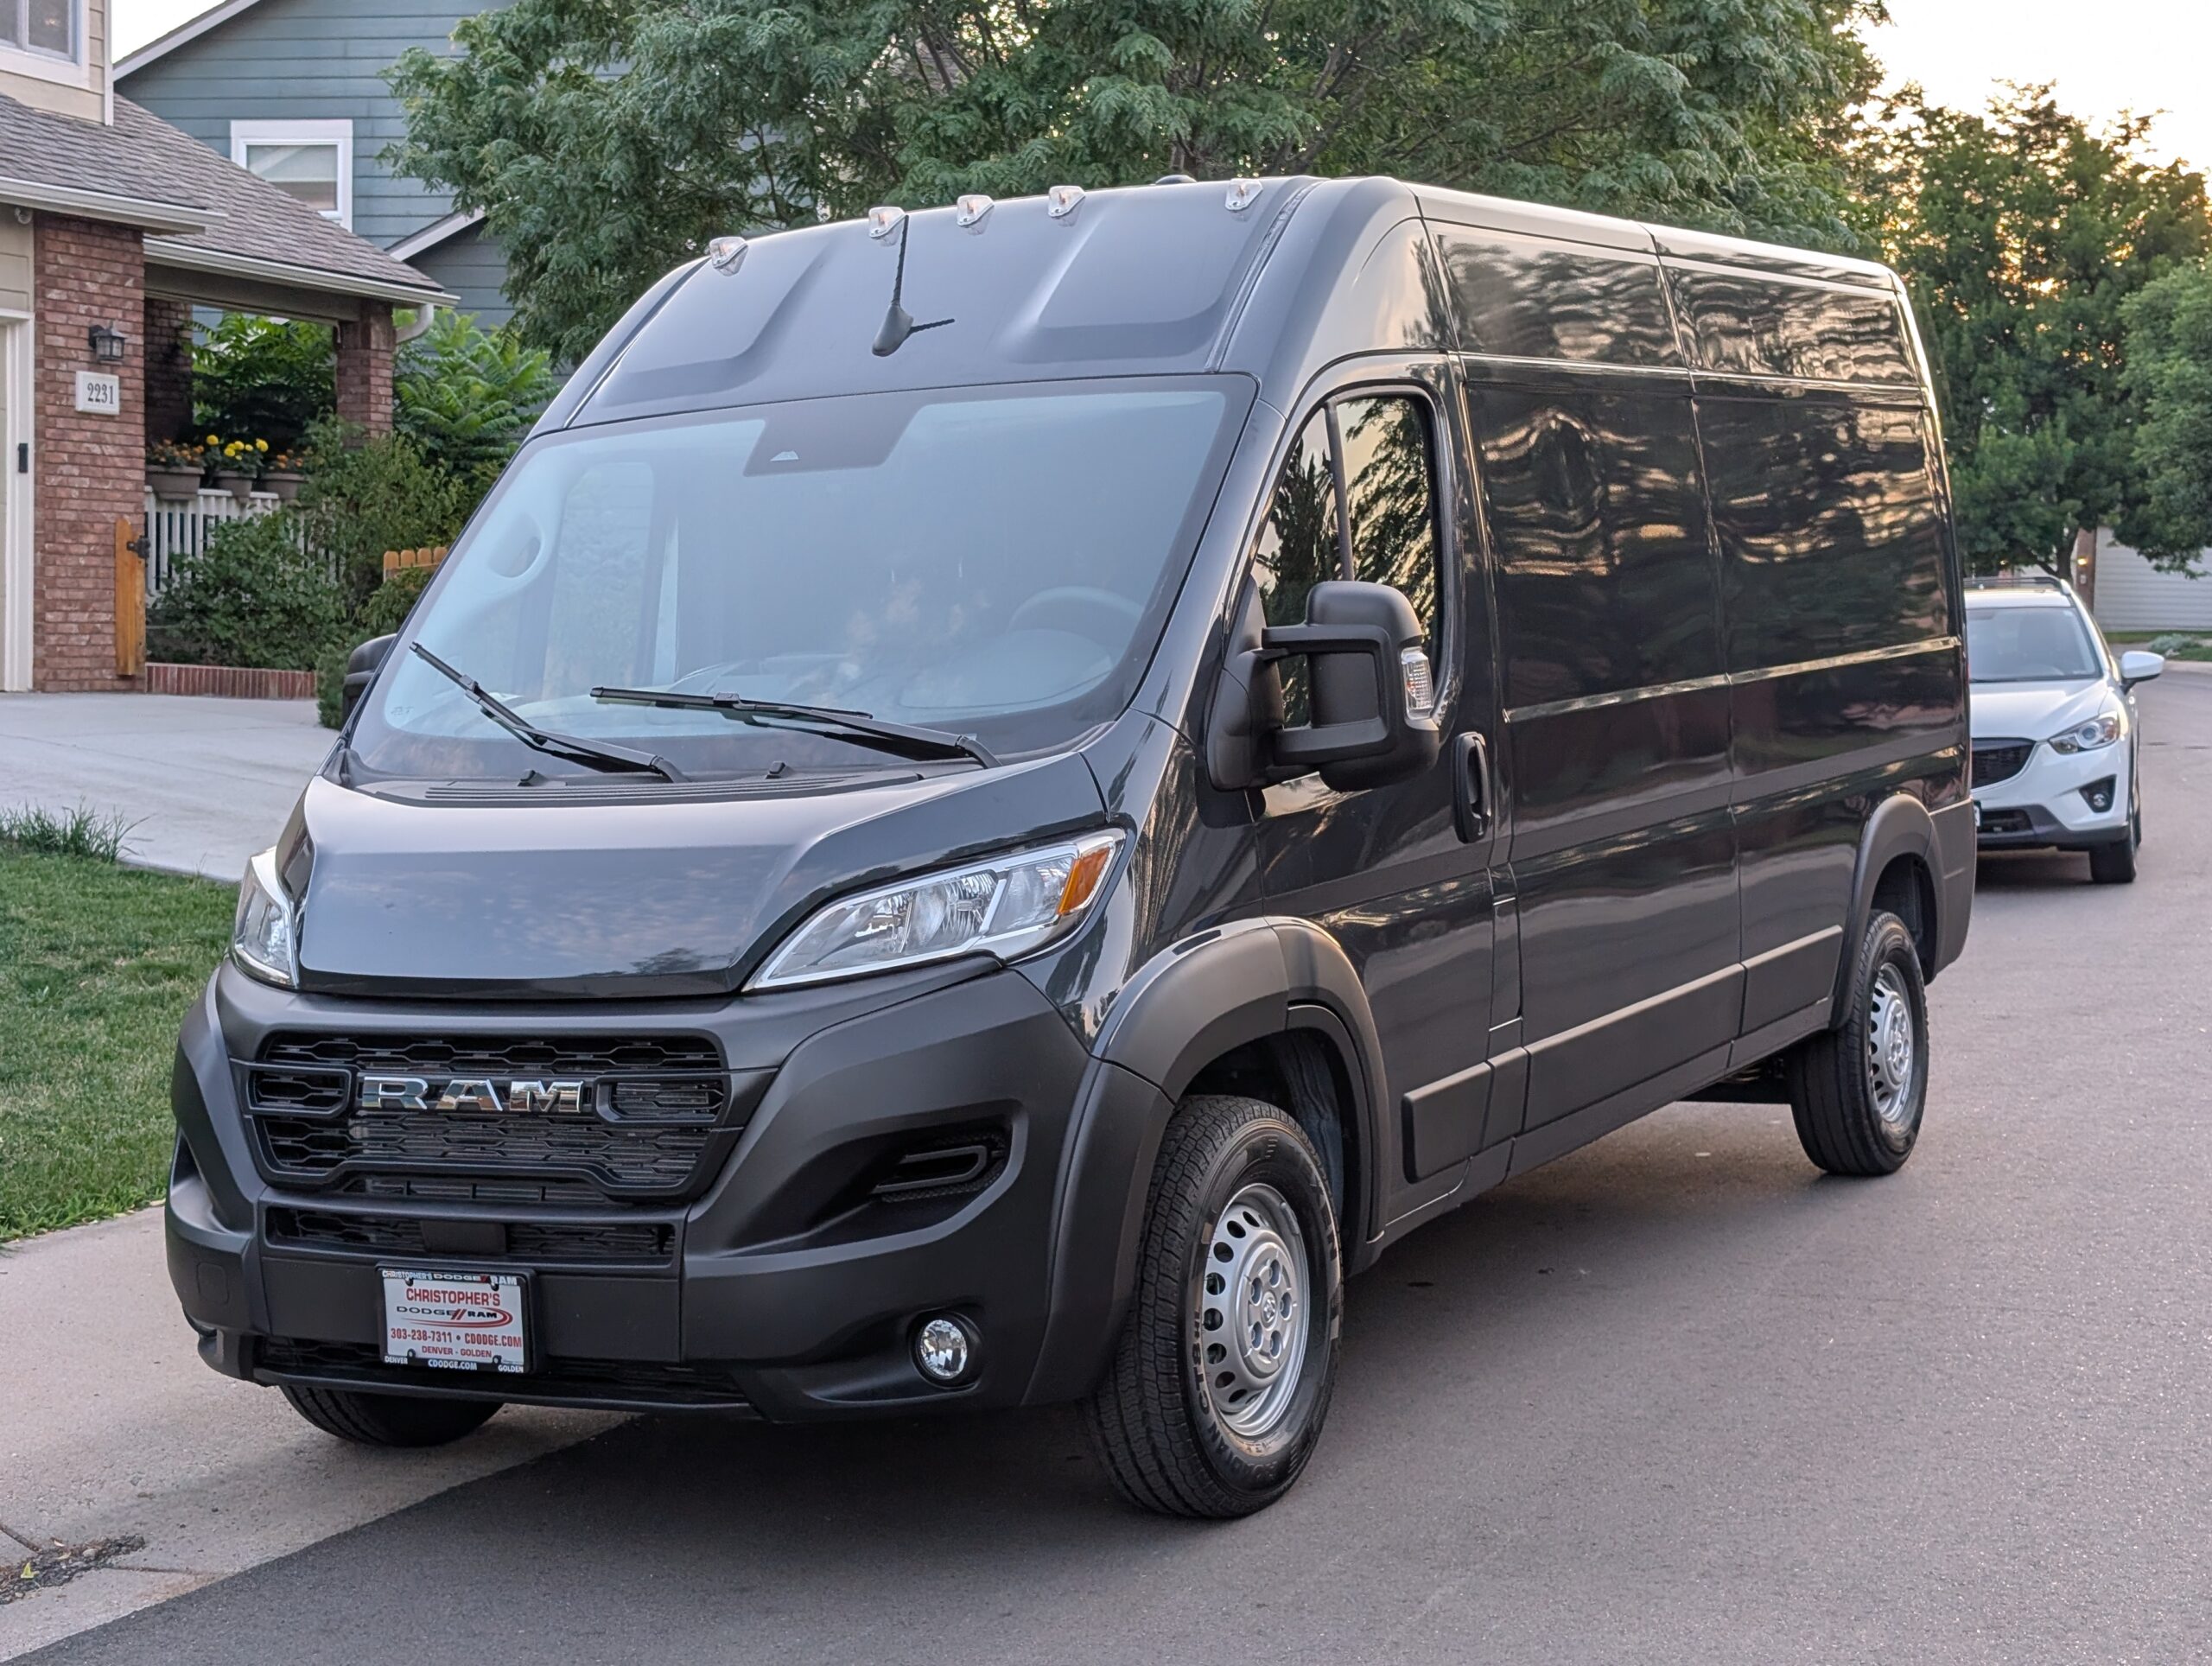
The van is a 2026 Ram ProMaster 3500 High Roof with the 159-inch wheelbase, non-extended version.
When I bought it, I was thinking several years ahead. My son graduates from high school in the spring of 2029, and hopefully the 2030s will give me more opportunities to spend time traveling and exploring the country. The idea was to buy the van well ahead of that point and gradually turn it into something I could use for extended road trips.
However, I’ve made considerably more progress than I expected this early, and instead of waiting several years to really use it, I plan to start using it as soon as practical. It doesn’t need to be “finished” for that to happen. I figure that just using it “as-is” is the best way to know what I need to do to keep evolving it to fit my needs.
I work from home and currently have a somewhat flexible work situation, so I like the idea of occasionally taking the van somewhere interesting within driving distance and working from there for the day. It could also be useful for work trips when that makes sense.
For camping trips, it could be something my son and I use over the next few years. For longer road trips with my wife, the van may also turn out to be a good option. These uses should give me an opportunity to learn what works and what doesn’t before we eventually have more time to travel in it.
A Camper, but Not Necessarily an RV
When I started this project, I wanted to retain as much cargo-van functionality as possible. I wanted a camper that I could take apart relatively easily and turn back into a useful cargo van. That idea hasn’t disappeared, but my priorities have shifted.
Ultimately, I bought the van primarily because I want a camper. It can still haul things, and I don’t intend to make it unnecessarily difficult to take things apart, but preserving maximum cargo capacity is not a major design decision.
That doesn’t mean I’m trying to build a conventional RV, either.
I’m approaching this incrementally and somewhat iteratively. I’ll build something, use it, see how it works, and continue from there. I’d rather have a simple system that I understand and can repair than something more elaborate.
I also still use what I think of as a reversible-build philosophy, although I should probably explain what I mean by that.
I’m not trying to make the van conveniently modular so I can change its configuration every weekend. I don’t expect to routinely remove the bed or rearrange the interior.
What I mean by reversible is that, where reasonable, I want to be able to gracefully disassemble something I built without destroying the van or the thing I built. Screws and bolts generally appeal to me more than permanently gluing everything together. If I decide three years from now that a cabinet belongs somewhere else, I’d rather unscrew it than use a Sawzall and prybars.
Obviously there are limits. I’ve drilled holes. I cut a large hole in the roof for a fan. I’ve used structural adhesive where it made sense. A useful camper can’t be built without making some permanent decisions.
The goal isn’t theoretical reversibility at all costs. It’s simply avoiding destructive construction when there isn’t a good reason for it.
The Floor
The current floor stack, from bottom to top, is:
factory ribbed steel floor → 1/2-inch Owens Corning FOAMULAR NGX XPS → 19/32-inch Roseburg ACX plywood → BedRug
The XPS and plywood are not glued down. That was intentional. The pieces fit tightly, the finished assembly behaves well, and I didn’t see a compelling reason to permanently bond everything.
I also removed the factory D-ring cargo tie-down loops but preserved their threaded attachment locations with bolts below the foam level. The factory mounting points may be useful again.
The BedRug has made the unfinished interior considerably nicer to work in while the rest of the construction continues. I also added a nicer rug between the bed and front seats.
I’ve had to cut up the BedRug in areas where I needed direct attachment to the floor — e.g., the galley and diesel heater stand.
The Bed
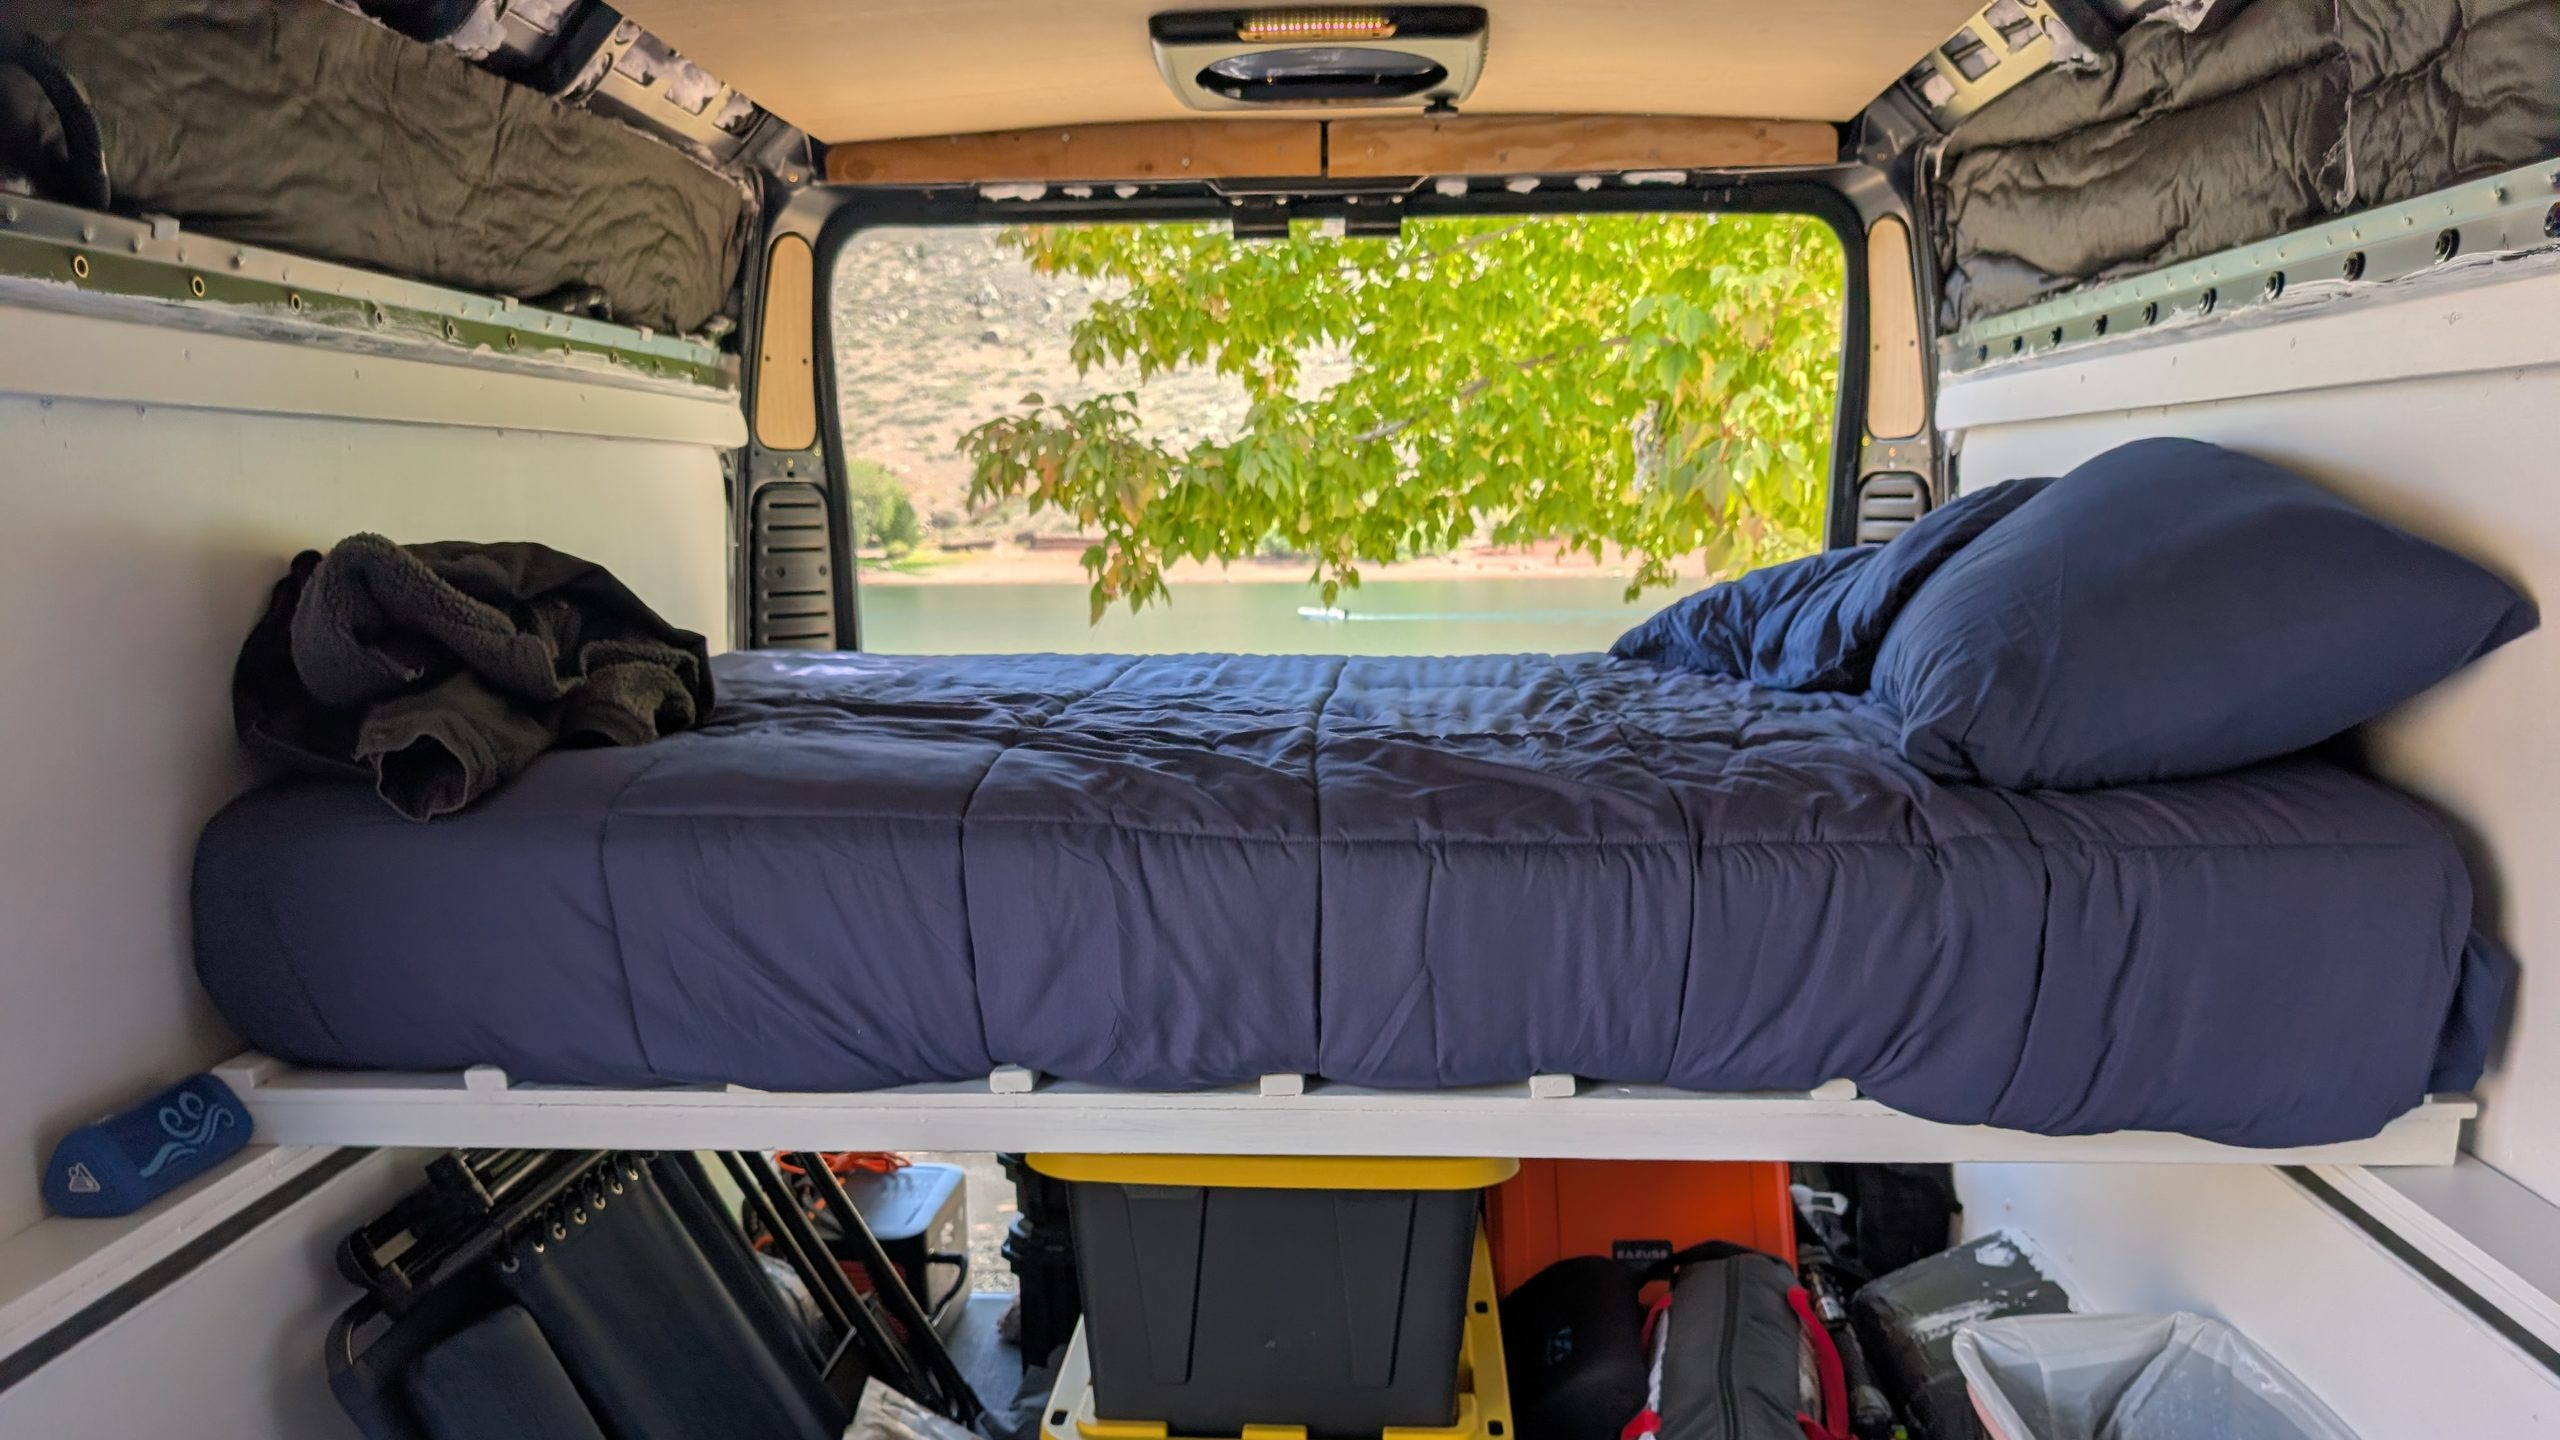
The bed is an east-west bed across the width of the van. Preserving enough width to sleep comfortably in that direction was one of the places where saving inches—and sometimes fractions of inches—really did matter.
The platform is approximately 55 inches front-to-back and about 35.5 inches above the floor.
I built it as two sections. Each section consists of two lengths of 1-5/8-inch, 12-gauge Unistrut spanning the width of the van with a 15/32-inch plywood deck. Both sections are now constructed, painted, installed and fixed to the van.
The platform spans small shelves I built along each side of the van. At the ends of the plywood bed sections, between the Unistrut rails, I installed 2x4s. Cabinet screws come up from underneath the side shelves and into those 2x4s. The result is extremely solid.
The mattress is an 8-inch Mira Firm Full Mattress from American Furniture Warehouse. It’s a traditional coil-spring mattress rather than memory foam, and it fits the platform perfectly. I added a mattress protector, sheets, blanket, comforter and pillows.
I also designed the bed for mattress ventilation. I installed 1×2 rails on top of the plywood platform and drilled 32 2-inch ventilation holes through the plywood. Between the ventilation holes, the air gap created by the rails, the more breathable construction of a conventional coil mattress, and the open garage space underneath, there should be plenty of airflow to mitigate moisture accumulation and mold concerns underneath the mattress.
The Roof Fan
I installed an AirPlus Deluxe fan using a contoured ProMaster roof adapter from DIYvan and a custom-built interior plywood backing frame.
That installation involved cutting the 14-by-14-inch opening in the roof, deburring it, treating the exposed steel with Weicon brushable zinc coating, bonding the backing frame and exterior adapter with Sikaflex 221, installing the fan over putty tape, and sealing the exterior with black Dicor.
The Ceiling Is Basically Finished
The main panels for the ceiling are essentially finished, but I’ll need to remove the panel toward the rear to do some additional electrical work and roof penetrations when I add solar panel eventually.
The construction is essentially:
roof steel → Thinsulate insulation → factory roof ribs → 15/32-inch plywood furring → 1/4-inch plywood finish panels
The furring and insulation are installed, and the plywood-based ceiling is up. I set it up so one of the ceiling panels is particularly small and can be easily removed near the area where I can access the current Starlink power pass-through, and where I plan to add cables for solar eventually.
Lighting
I installed four 12-volt dimmable RV lights—three on the ceiling and one under the bed for the garage area. The one under the bed failed (manufacturer defect) and needs to be replaced now.
Most of the time I’ll probably run one light, often dimmed. But when I’m working on something, cleaning, looking for something, or simply want a lot of light, I can illuminate the whole interior very brightly.
The garage light should also become considerably more useful once I start organizing and enclosing that space.
Electrical
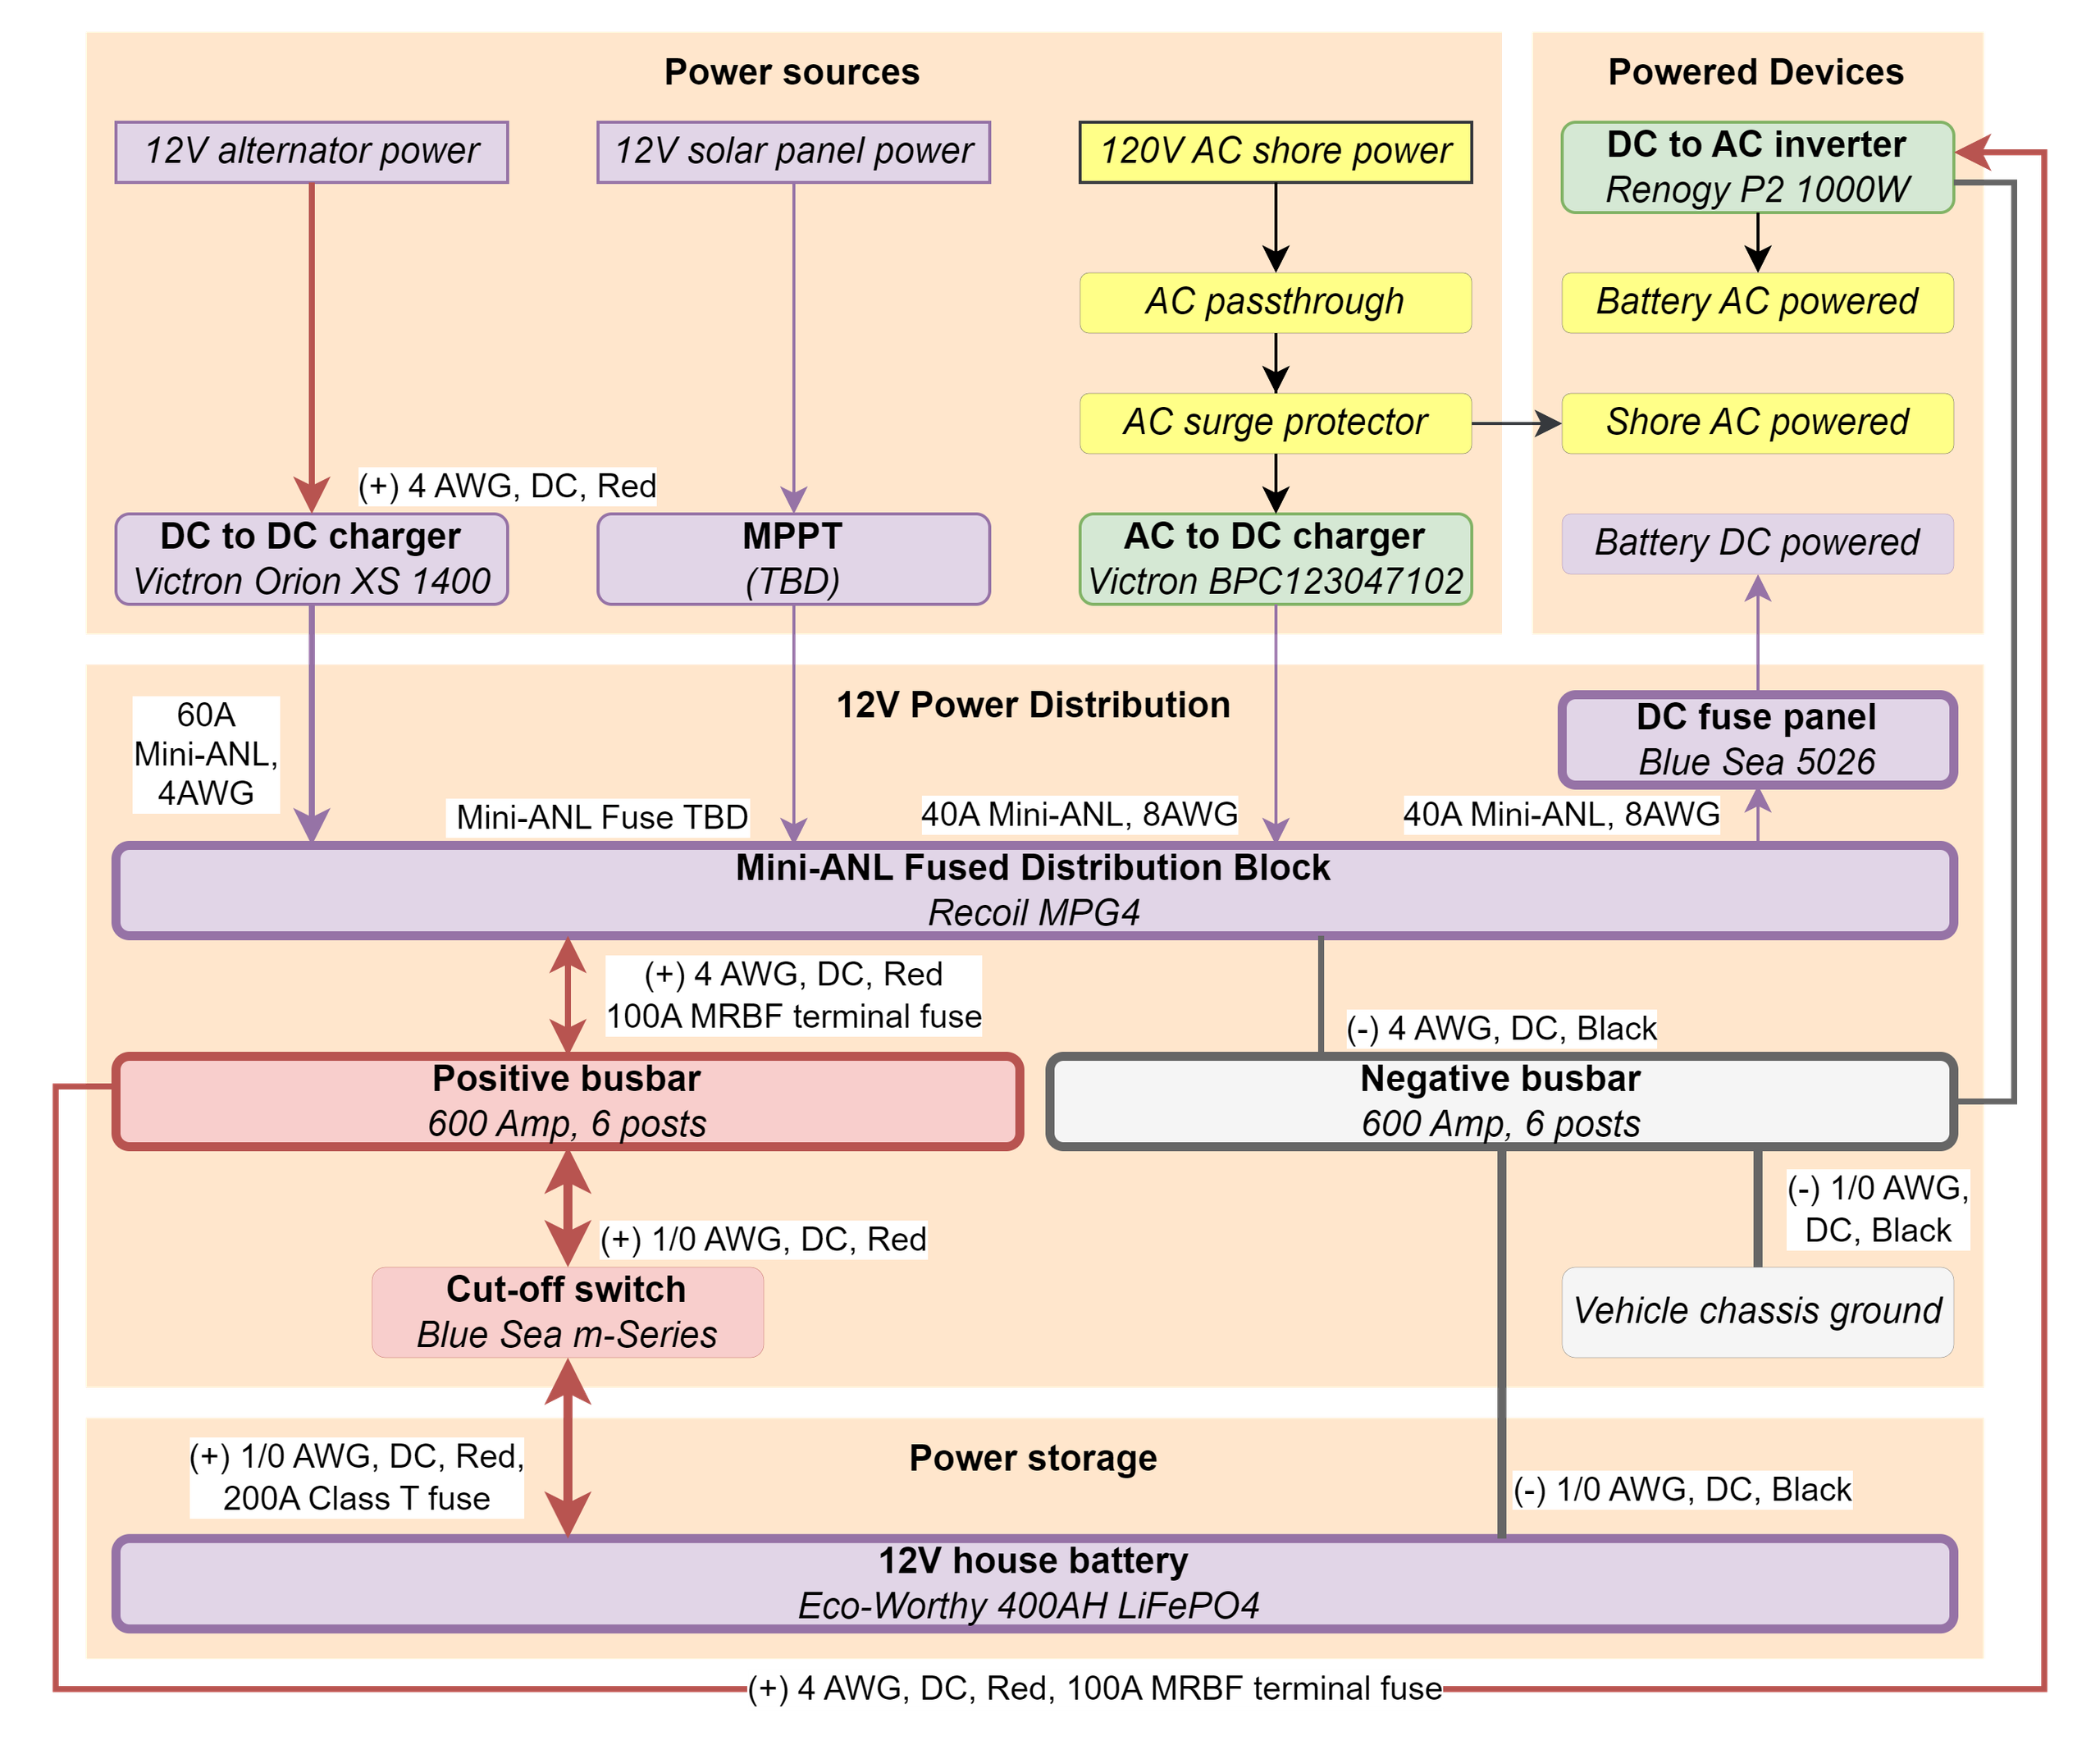
In a nutshell, the backbone of the electrical system is a 12V LiFePO4 battery (400AH) that I can charge from shore power or the vehicle alternator. At the time of this writing, I have an inverter, but I’m waiting to install after a special fuse arrives that I ordered. Later (likely no earlier than mid 2027), I might add solar panels as an additional charging source.
Since the electrical system is somewhat complex on it’s own, I’m tracking progress on this in its own post here: https://www.geohub.com/van-electrical-system/
Starlink and Roof Wiring
I mounted my Starlink Mini on the roof, with power run through the roof. For power, my current setup is essentially:
fuse panel → 12 AWG interior wiring → weatherproof roof pass-through → short replaceable Starlink-specific waterproof power pigtail → Starlink Mini
The roof penetration uses an ABS cable-gland housing, sealed with Sikaflex 221.
Preparing for Solar
I may eventually install an additional roof pass-through for solar power cables.
I don’t know which solar panels I might buy yet. I don’t know whether the panel arrangement might be series, parallel or series-parallel. I haven’t selected the MPPT controller. For wiring actually exposed on the roof, I have 12 AWG photovoltaic wire intended to tolerate sunlight, moisture and the temperature/environmental conditions associated with rooftop solar installations. But I haven’t run the wires yet.
The Walls
The rear wall sections on either side of the bed are structurally complete and primed. They’re functional, but I haven’t decided how I ultimately want to finish them cosmetically.
There is still structural work, wiring and other construction that needs to be done. It doesn’t make sense to worry about decorative finishes now and then damage them while installing everything else. I may also eventually want a more uniform finish throughout the interior, so I’m comfortable leaving those sections primed for a while.
The rear bed-area walls are somewhat unusual because maximizing the east-west sleeping dimension was important. I intentionally used a thinner construction approach there.
For the remaining walls, I don’t care nearly as much about saving every millimeter. I’ll probably use a more traditional furring + insulation + paneling approach. That will be easier to construct, provide more space for insulation and wiring, and give me better attachment opportunities for whatever eventually gets mounted to the walls.
The Galley
I built a small galley, but haven’t finished it yet. I still need to build the cupboard doors and do a few other minor things. I built it with a 15-by-15-inch stainless-steel sink, along with 5-gallon containers that I use for fresh and gray water. I also installed a SEAFLO 33 series RV Water Pump – 12V, 3.0 GPM 45 PSI, Self Priming — wired to my 12V distribution system.
I’m keeping the water system simple. The fresh-water container feeds the pump, and the sink drains into a removable gray-water container. I’m avoiding installing permanent tanks while I figure out how much water I actually use. Maybe the 5-gallon containers are enough for my use.
Closing In the Garage
I’m considering making the garage area under the bed one of my next projects. The bed leaves a large open storage area underneath it. That has been useful while building the van, but I think I’m getting to the point where enclosing the front of that space would improve safety, appearance and functionality.
My current thought is something fairly simple rather than elaborate cabinetry. I could close off the garage from the living area while leaving an access door in the front. Smaller equipment could initially be organized in removable bins.
That would give me a cleaner separation between the living space and whatever eventually gets stored in the garage without forcing me to decide on the final storage system yet.
As I work through the electrical in the garage area (see https://www.geohub.com/van-electrical-system/), I’m also thinking about how to safely separate electrical components from everyday use items. So I may need to reach a more completed electrical state before I come back to the garage storage construction. This is also an interesting challenge in figuring out how accessible electrical components like fuses need to be. Right now, it’s easier to change a fuse from the back of the van with the rear doors open, rather than crawling under the bed with the doors closed. I’m just thinking through dealing with electrical issues in a rain storm, etc.
TV and the Area at the Foot of the Bed
I installed a 24-inch Roku TV, mounted it near the foot of the bed on the passenger/curb side. I bought a simple flat TV wall mount to install it, and built a wall structure with 2x4s and cedar panels to mount it on. I also installed a simple TV remote holder that is hidden behind the TV.
Since the TV is AC powered, I just have an AC cord run through the wall to my temporary Jackery power supply. This roku TV has worked fine with this power arrangement and Internet provided via Starlink/Wifi for streaming services. I also installed a small custom shelf for a Blu-Ray player and to hold some Blu-Rays. After I install a more permanent inverter, I’ll stop using the Jackery to power these devices.
Which End of the Bed Is the Head?
Something thought about when I was first working on the bed is which direction I normally want to sleep. My preference was to have my head toward the driver/street side and feet toward the passenger/curb side.
The reasoning is simple: streets are crowned so water drains toward the curb. When the van is parked along a street, that should most often leave the driver side slightly higher than the passenger side. If I have to sleep somewhat off-level, I’d rather have my head slightly uphill than downhill.
That obviously won’t apply everywhere, and campsites are a different situation entirely. I still plan to carry leveling blocks, which I’ve already purchased.
I also don’t imagine I’ll be sleeping in the van often while parked along a street, but I still thought it was an interesting consideration.
Having a normal sleeping orientation gave me a useful constraint when deciding where the TV and other bed-area equipment should go.
What About a Shower and Toilet?
This one is still in the “wait and see” category. I’ve spent some time thinking about a dedicated wet room containing a shower and removable toilet. I’ve looked at shower-pan dimensions, mocked up footprints and considered how much interior space I’d be willing to give up. I’m still on the fence.
For now, I think the smarter answer may be not to build one. I have a Planet Fitness membership, which gives me one shower option while traveling in many areas. Campgrounds and other facilities provide additional opportunities. Between those, I can use the galley sink for basic cleanup on nights when a shower isn’t conveniently available.
I’d rather try that for a while than devote a substantial chunk of limited van floor space to a shower. If experience tells me a shower would materially improve the way I use the van, I can build one later.
I also purchased a modular shower base and curtain system and I’m considering if/how to use it in the van. I can fairly easily add a shower head to the existing plumbing, but I don’t have a water heater — so just cold showers for now if I try this.
For toilette, I’ll most rely on campsite toilets, gas stations, etc. but I do have portable toilette options for off-grid or emergency use.
Air Conditioning — Probably Not
A roof A/C would be nice sometimes. But “nice sometimes” isn’t enough justification for everything that comes with it.
A/C means buying and installing the unit, giving up roof space, adding weight, substantially increasing electrical demand, building enough battery/charging capacity to support it, maintaining it, and accepting a complicated system that can eventually fail.
When I looked at the van holistically and considered how I expect to use it, I came to the conclusion that the juice isn’t worth the squeeze. I already have a powered roof fan. I can deal with some heat, and more importantly, I can use trip planning to avoid the worst heat in the first place.
I’m not declaring that the van will never have air conditioning. I’m simply not designing around it right now. If I spend a summer traveling and decide I’ve made a mistake, I can revisit the question with actual experience instead of speculation.
On a related note, I purchased and fit test a screen system that uses magnets and allows me to keep either the side or back doors open without letting bugs in. I’m considering buying another one so I can open everything up when it’s really hot out, but I’ll wait to see how the first one works out and if I really need it. I also have special vents that work with the front door windows.
Windows — Same General Idea
I’m not planning to add additional windows right now. Windows obviously have advantages, but not having them has advantages too: privacy, insulation, security, fewer holes in the van, fewer opportunities for leaks, and more uninterrupted wall area for cabinetry and other equipment.
Again, nothing prevents me from changing my mind later. I’d rather discover through actual use that I genuinely want another window than cut a large irreversible hole in the van.
The most compelling argument to add a window right now is for the passenger side blind spot. Adding a window to the sliding door would be an advantage for safety while driving.
Fridge
I’m using a small BougeRV fridge that I’ve used in the past for roadtrips in our 4Runner. I wired it directly to the fuse panel, sacrificing the plug it had that used to have a 12V plug on it. If I decide I’m going to use the fridge in the 4Runner again, I’ll need to order a new 12V cord. The fridge seems to work great in the van, but I need to decide on the final place that it is physically arranged in the van. Right now, it sits on the floor under the bed.
Things I’m Intentionally Not Deciding Yet
There are still plenty of unanswered questions. I haven’t finalized the permanent electrical architecture. I haven’t selected the fixed solar panels or MPPT. I haven’t decided where every cabinet will go. I haven’t committed to a shower. I’m leaning away from A/C and additional windows, but experience could change either decision.
Where Things Stand Now
The insulated floor and BedRug are in. The roof fan is installed and working. The bed platform is finished, painted and securely mounted. The mattress and bedding are in. The rear bed-area wall structure is built and primed. The ceiling is insulated, furred and paneled. Dimmable interior lights are installed and working. I have a Starlink mini installed for WiFi and a TV available for streaming entertainment, and a Blu-Ray player as well. I have a simple fresh and gray water system in my sink galley. I have a diesel heater installed for heat. I have a battery to power the 12V system, which can be charged off shore power or while driving.
I still need to finish the walls, etc. I don’t have a completion date because I don’t really need one. The van is already useful, and I’d like to take more trips with it while the build continues.
Actually Using the Van
I have just camped one night in the van to test things out, but we’ve been taking it on short trips to Horsetooth Reservoir, which is only about 10 minutes form our house. We’ll just spend an hour or two at a time when the weather is good at the picnic sites. Laurie likes to read in the bed with the backdoors open and looking out over the lake, while I read or work on my computer.
My one night in the van recently gave me a chance to see how everything works in practice. Here are some observations:
- I need to remember things will be a lot tighter when it’s not just me.
- I need to see if/how I can put something in the roof vent opening to add insulation when its cold and the fan isn’t needed.
- I need to install a towel ring for hand towels.
- I need to keep “clean up” rags somewhere — with some kind of system to separate clean rags.
- While I test the water pump and diesel heater air pump on the same 10 amp fuse as a matter of convenience (running to toggle switch panel with its own additional fuses), I suspected that wasn’t a good idea, which was confirmed at 5:40AM on my first night in the van! I turned off the heater when I went to bed, but by about 5:40AM is was 52 degrees Fahrenheit in the van and I wanted to warm it up. I turned on the diesel heater then ran the sink to rinse a cup that was left out. This blew the fuse. The diesel heater draws a lot more power when it is first starting up than it does during normal operation, and I guess I had never tried running the water pump after the diesel heater was first started.
- I need to consider safe, convenient access to the fuse panel from inside the van. To change a fuse, it’s relatively easy to open the rear doors and do this. It’s much less convenient to crawl under the bed to do this.
- I’m just mentioning some electrical stuff for completeness, but I’m tracking this in more detail elsewhere. The electrical components as installed need additional structural work to protect against accidental contact. I’ll address this soon, when I install the inverter. This will also involve providing additional airflow to the DC-to-DC (alternator) charger and shore power charger.
- Things were generally pretty cluttered because I lack cabinets, etc. at this point. I won’t go into detail here, but I’ve got a better idea now of what I need to do.
- Install the fire/CO alarm. I turned this on for the first time, but just set it on the galley surface. It needs a more permanent install. It can be turned off when the van is not in use to save battery.
- I turned off the heater when I went to bed because I wanted to see how long it stayed warm. It got down into the 30s last night. It was about 70, maybe 72 in the van when I turned off the heater around 11PM, and it got down to 52 by 5:40AM.
- Get a thicker blanket for the bed. Things felt pretty cool at 52 degrees with the thin blanket currently on the bed. A thicker blanket should help.
One thought on “Van Build Status”
Comments are closed.