The SIMDIS SDK provides a library of functions for creating or enhancing 2D and 3D geographic visualization and analysis systems. It is an open source project sponsored by the US Naval Research Laboratory and provides the foundational elements that the SIMDIS application is composed of. While the SIMDIS SDK is open source and available from github, the SIMDIS application (actually a suite of applications) is distributed through the TRMC website (requiring authentication with a DoD Common Access Card).
In this post, I am just focusing on the SIMDIS SDK which can be obtained from github. Specifically, I will discuss prerequisites, how to download, how to configure a SIMDIS SDK build, how to build the SIMDIS SDK, and how to install the SIMDIS SDK. For the time being, I’ll be using Windows 11 and Visual Studio 2022. I may expand on this later with notes related to other operating systems and build environments.
Some prerequisites that will be needed. I’ll list what I am using.
- Microsoft Windows 11 OS build 22000.675
- Microsoft Visual Studio Community 2022 (64-bit) Version 17.1.6
- git version 2.35.1.windows.2 (using a “Git Bash” migw64 terminal)
- cmake version 3.22.3 – CMake suite maintained and supported by Kitware (kitware.com/cmake)
- Qt SDK
“git clone” the repo:
mkdir -p ~/github.com/USNavalResearchLaboratory
cd ~/github.com/USNavalResearchLaboratory
git clone https://github.com/USNavalResearchLaboratory/simdissdk.git
Checkout tag for the release version that we are interested in:
cd simdissdk
git checkout tags/simdissdk-1.22
Prepare build directory:
mkdir build
cd build
cmake ..
This will generate several files, including the Visual Studio solution file ~/github.com/USNavalResearchLaboratory/simdissdk/build/SIMDIS_SDK.sln. Open SIMDIS_SDK.sln in Visual Studio.
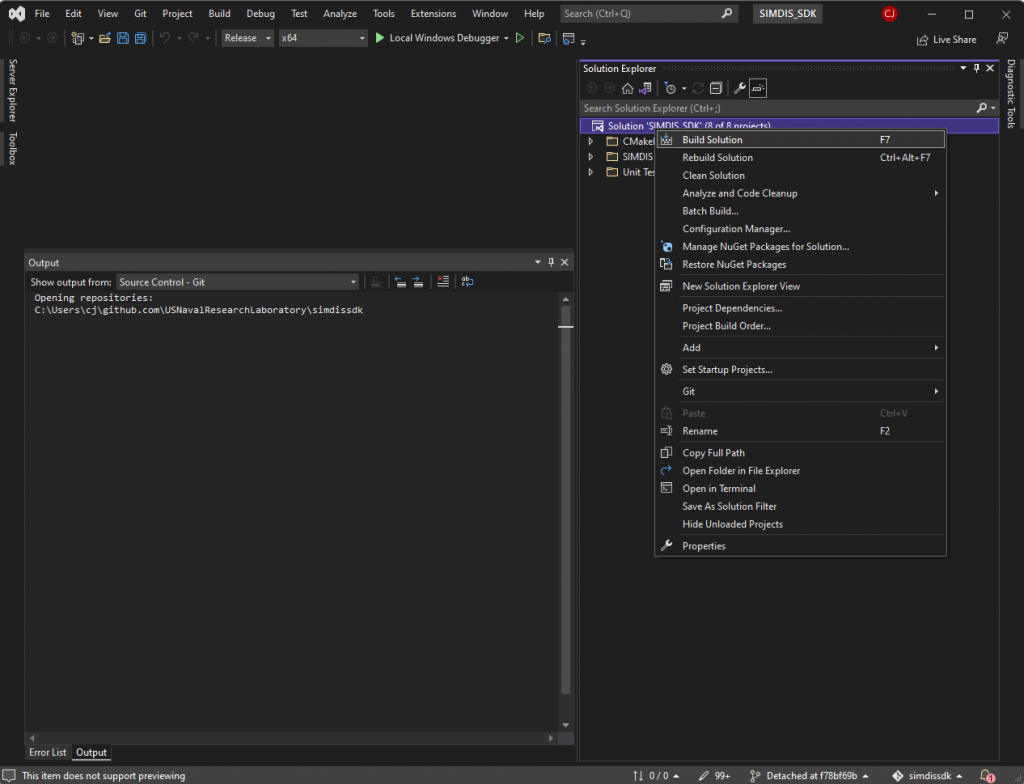
In Visual Studio, change the solution configuration to “Release” and build the solution (F7):

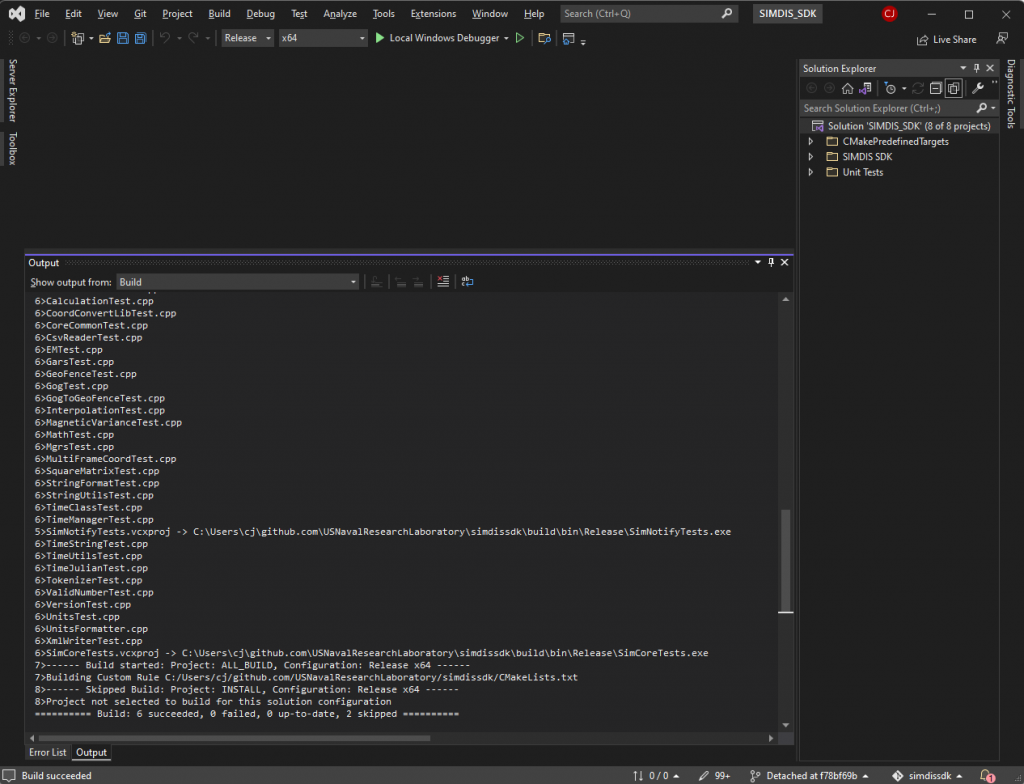
A successful build will indicate “0 failed”:

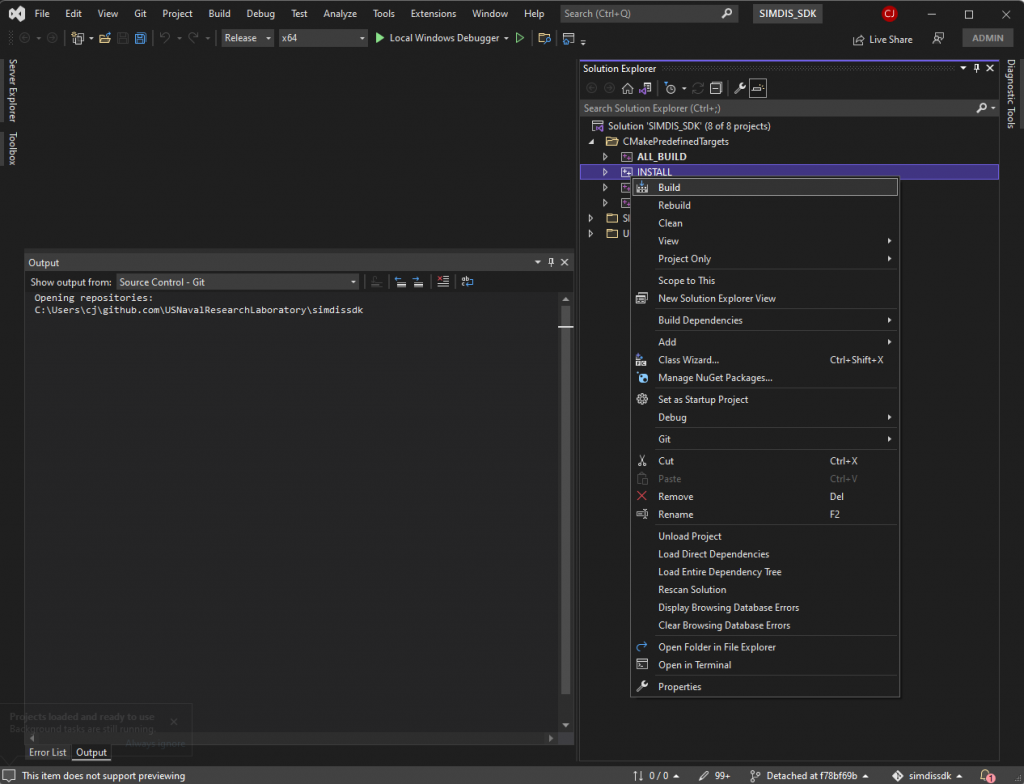
To install the SDK, restart Visual Studio as an administrator, re-open the solution file and build the “INSTALL” project.

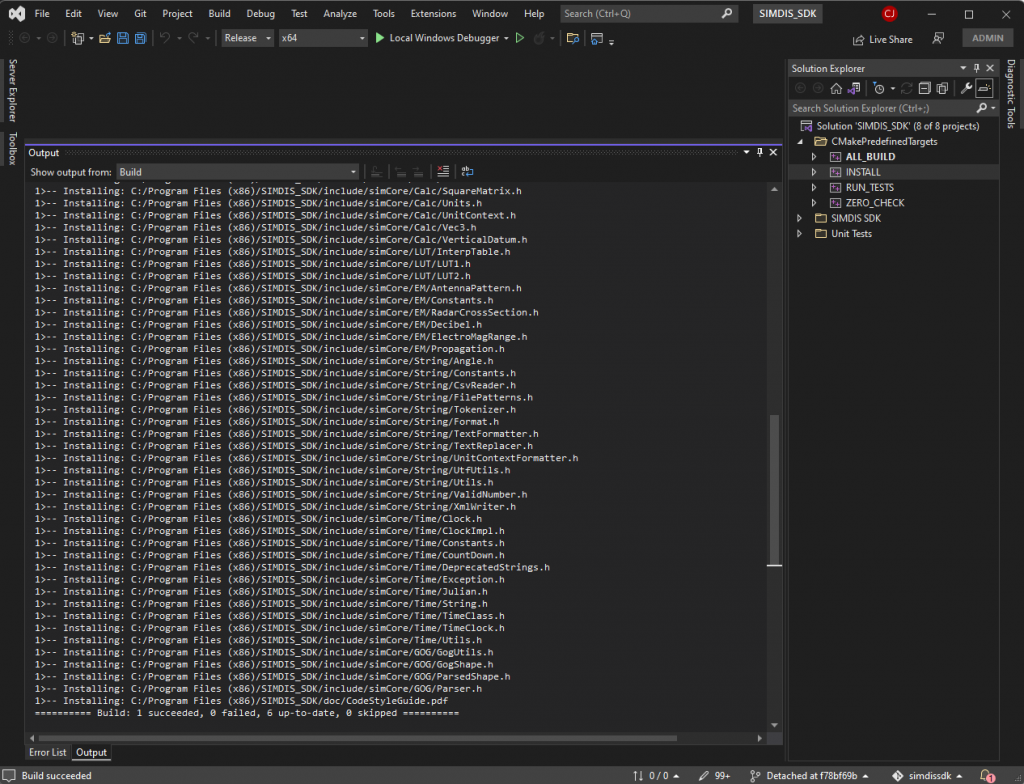
A successful install will look like this:

Now that we have the SIMDIS SDK installed, we’ll want to integrate into our own projects. I’ll provide some guidance on one way this can be accomplished. First, we will add an environment variable that points to our installation location. I’ll usually open the environment variables editor by hitting the Windows key, starting to type “environment”, then clicking the “Edit the system environment variables” option when it pops up. You can also navigate to these options in the control panel.

This will open the system properties dialog. From there, click the “Environment Variables” button.

This will open the environment variables dialog.

From this dialog we can add, edit, and remove environment variables that are scoped for the the current user or the entire system. I’ll usually, add SDK related variables for the entire system, but it may be more appropriate to limit to a single user. Click the “New” button to add a SIMDIS_SDK variable pointed to your SDK path:

Click the “OK” button in the new system variable dialog. Then Edit the “Path” variable to add “%SIMDIS_SDK%\bin” to your path.

Click the “OK” button in the edit system variable dialog. Then, click the “OK” button in the environment variables dialog. Then, click the “OK” button in the system properties dialog. You can verify that the new variables are set using a new command prompt window (variables are only applied when new windows are opened):

In the project you are going to use the SIMDIS SDK in, add the following to your CMakeLists.txt file (after the project name has been declared):
file(TO_CMAKE_PATH "$ENV{SIMDIS_SDK}" SIMDIS_SDK)
list(APPEND CMAKE_MODULE_PATH "${SIMDIS_SDK}/lib/cmake")
cmake_print_variables(CMAKE_MODULE_PATH)
find_package(SIMDIS_SDK COMPONENTS Widgets REQUIRED)
Add the libraries you plan to use in target_link_libraries
target_link_libraries(appname ... VSI::simCore)
Add the DLLs that you will link against for the final installed version of your app/library:
install(FILES ... "${SIMDIS_SDK}/bin/sdk16-simCore.dll" DESTINATION ${LIB_INSTALL_DIR})
In the source code of your project, you should now be able to “include” the header files from the SIMDIS SDK. See SIMDIS SDK documentation for usage and examples.
What about Linux? Much easier. After running cmake, just run “make” to build the project. then “sudo make install” to install it.